本文共 8811 字,大约阅读时间需要 29 分钟。
最近公司需要搭建一台FastDfs 分布式文件系统,查询和参考了网络很多资料,但是从头到尾按他们的配置,中间都会或多或少的出错,可能是版本的问题,也可能是其他问题,经过自己不断的研究,终于成功配置完成,而且已经应用线上。现在把经验分享出来供大家参考,也作为自己的一个记录,以便今后用到能回顾一下。
1、下载软件
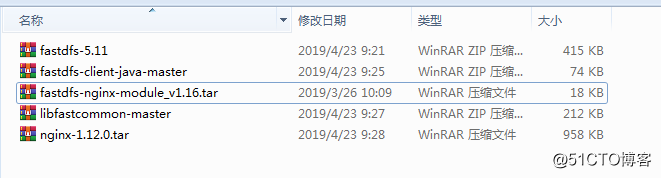
网上先下载需要安装的软件
2、前期准备
所需的工具下载完毕后,开始搭建准备,首先下载所需全部工具运行命令
yum -y install zlib zlib-devel pcre pcre-devel gcc gcc-c++ openssl openssl-devel libevent libevent-devel perl unzip net-tools wget 下载完成后,安装rz命令 yum install lrzsz -y 通过rz命令 或者xftp上传到/home目录下自己新建一个目录(根据个人习惯),主要用于1下载的软件存放目录。 cd /home mkdir kai ls cd kai 上传软件到kai目录下

3、安装libfastcommon
解压刚上传的文件,然后进入解压完的文件目录
[root@localhost kai]# unzip libfastcommon-master.zip [root@localhost kai]# cd libfastcommon-master [root@localhost libfastcommon-master]# ll 我们能看到
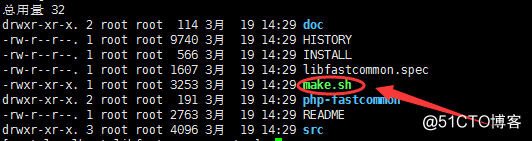
开始安装,执行
[root@localhost libfastcommon-master]# ./make.sh [root@localhost libfastcommon-master]# ./make.sh install
看看有没有报错,没有报错就可以执行软链接
ln -s /usr/lib64/libfastcommon.so /usr/local/lib/libfastcommon.so ln -s /usr/lib64/libfastcommon.so /usr/lib/libfastcommon.so ln -s /usr/lib64/libfdfsclient.so /usr/local/lib/libfdfsclient.so ln -s /usr/lib64/libfdfsclient.so /usr/lib/libfdfsclient.so
4、安装FastDfs
然后回到/home/kai (或自己创建的文件下)
解压fastdfs[root@localhost kai]# unzip fastdfs-5.11.zip
然后进入fastdfs5.11
[root@localhost kai]# cd fastdfs-5.11 [root@localhost kai]# ./make.sh [root@localhost kai]# ./make.sh install
成功之后查看目录
[root@localhost kai]# cd /etc/fdfs [root@localhost fdfs]# ll -rw-r--r--. 1 root root 1461 4月 23 10:20 client.conf.sample -rw-r--r--. 1 root root 7927 4月 23 10:20 storage.conf.sample -rw-r--r--. 1 root root 7389 4月 23 10:20 tracker.conf.sample我们需要把这三个实例文件服务一份,去掉sample [root@localhost fdfs]# cp client.conf.sample client.conf [root@localhost fdfs]# cp storage.conf.sample storage.conf [root@localhost fdfs]# cp tracker.conf.sample tracker.conf
OK,FastDFS安装结束 。
5、安装tracker
创建tarcker工作目录
这个目录可以自定义,用来保存tracker的data和log根据习惯创建目录:
[root@localhost fdfs]# cd /usr/[root@localhost usr]# mkdir kai[root@localhost usr]# cd kai[root@localhost kai]# mkdir dev[root@localhost kai]# cd dev[root@localhost dev]# mkdir fastdfs[root@localhost dev]# cd fastdfs[root@localhost fastdfs]# mkdir fastdfs_tracker[root@localhost fastdfs]# cd fastdfs_tracker[root@localhost fastdfs_tracker]# pwd/usr/kai/dev/fastdfs/fastdfs_tracker[root@localhost fastdfs_tracker]#
配置tracker
[root@localhost ~]# cd /etc/fdfs[root@localhost fdfs]# vim tracker.conf
找到以下4处进行修改即可
1.disabled=false #默认可能开启 2.port=22122 #默认端口号 3.base_path=/usr/kai/dev/fastdfs/fastdfs_tracker #刚刚创建的目录 4.http.server_port=80 #默认端口是8080
保存修改文件
启动tracker 命令:
[root@localhost fdfs]# service fdfs_trackerd start
如果不能成功启动,可以通systemctl命令
systemctl start fdfs_trackerd
成功之后可以看见
[root@localhost fdfs]# service fdfs_trackerd start Starting fdfs_trackerd (via systemctl): [ 确定 ]
进入创建的tracker目录。发现目录多了data和log两个目录
[root@localhost fdfs]# cd /usr/kai/dev/fastdfs/fastdfs_tracker/[root@localhost fastdfs_tracker]# ll 总用量 0drwxr-xr-x. 2 root root 178 4月 23 10:45 datadrwxr-xr-x. 2 root root 26 4月 23 10:30 logs
我们不能每次都这么启动tracker,我们需要给tracker加入开机启动
首先需要给执行权限,
[root@localhost fastdfs_tracker]# chmod +x /etc/rc.d/rc.local
然后开始修改rc.local
[root@localhost fastdfs_tracker]# vim /etc/rc.d/rc.local
在配置文件最后加下最后一句话即可
#!/bin/bash # THIS FILE IS ADDED FOR COMPATIBILITY PURPOSES # # It is highly advisable to create own systemd services or udev rules # to run scripts during boot instead of using this file. # # In contrast to previous versions due to parallel execution during boot # this script will NOT be run after all other services. # # Please note that you must run 'chmod +x /etc/rc.d/rc.local' to ensure # that this script will be executed during boot. touch /var/lock/subsys/local service fdfs_trackerd start
保存,然后 查看tracker端口监听情况
[root@localhost fastdfs_tracker]# netstat -unltp|grep fdfs tcp 0 0 0.0.0.0:22122 0.0.0.0:* LISTEN 17664/fdfs_trackerd
到此22122端口监听成功。
6、安装storage
为storage配置工作目录,由于storage还需要一个目录用来存储数据,所以另外多建了一个fasdfs_storage_data
[root@localhost fastdfs]# ls fastdfs_storage fastdfs_storage_data fastdfs_tracker
修改storage配置文件
修改storage.conf[root@localhost fastdfs]# vim /etc/fdfs/storage.conf
找到如下几处地方修改即可
1.disabled=false
2.group_name=group1 #组名,根据实际情况修改 3.port=23000 #设置storage的端口号,默认是23000,同一个组的storage端口号必须一致 4.base_path=/usr/kai/dev/fastdfs/fastdfs_storage #设置storage数据文件和日志目录 5.store_path_count=1 #存储路径个数,需要和store_path个数匹配 6.base_path0=/usr/kai/dev/fastdfs/fastdfs_storage #实际文件存储路径 7.tracker_server=192.168.18.91:22122 #CentOS 7的ip地址 8.http.server_port=80 #设置 http 端口号保存之后,创建软引用
ln -s /usr/bin/fdfs_storaged /usr/local/bin启动storage
service fdfs_storaged start
同理 如果不能启动可以用下述命令systemctl start fdfs_storaged
成功应该是如下[root@localhost fdfs]# service fdfs_stroaged start Starting fdfs_stroaged (via systemctl): [ 确定 ]
同样设置开机启动
修改rc.local
vim /etc/rc.d/rc.local
最后加入
service fdfs_storaged start查看服务是否启动成功
[root@localhost fdfs]# netstat -unltp | grep fdfs tcp 0 0 0.0.0.0:22122 0.0.0.0:* LISTEN 17664/fdfs_trackerd tcp 0 0 0.0.0.0:23000 0.0.0.0:* LISTEN 17710/fdfs_storaged
服务启动,到此fastdfs已经配置完成了。最后我们再确认一下,storage是否注册到了tracker中去。
[root@localhost fdfs]# /usr/bin/fdfs_monitor /etc/fdfs/storage.conf
成功后可以看到:
ip_addr = 192.168.18.91 (localhost.localdomain) ACTIVE
含上面字句就算配置成功了
[root@localhost fdfs]# vim /etc/fdfs/client.conf base_path=/usr/kai/dev/fastdfs/fastdfs_tracker tracker_server=192.168.18.91:22122 http.tracker_server_port=80
接下来上传一张图片到centos7作为测试
用xftp上传test.jpg图片到/home/kai目录接下来/usr/bin/fdfs_upload_file /etc/fdfs/client.conf /home/kai/test.jpg #你上传的图片路径(centos上的)成功之后会返回图片的路径
[root@localhost fdfs]# /usr/bin/fdfs_upload_file /etc/fdfs/client.conf /home/kai/test.jpggroup1/M00/00/00/wKgSW1zAYuqAaSn6AAChouYMtyM839.jpg可以去刚上传的路劲查看是否上传成功
[root@localhost fdfs]# cd /usr/kai/dev/fastdfs/fastdfs_storage_data/data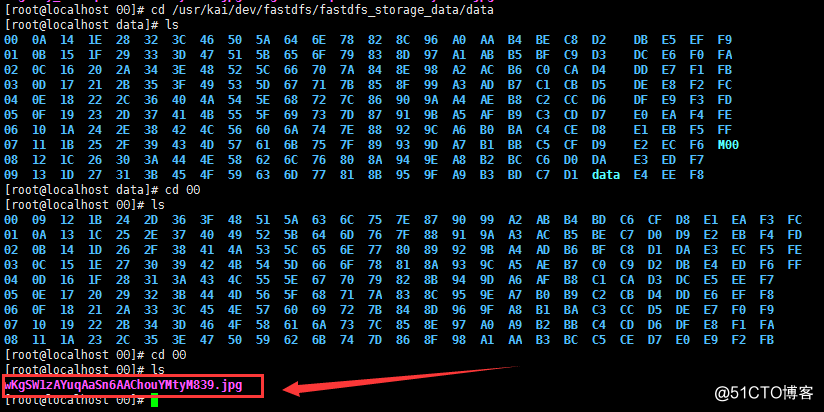
能找到刚才上传的图片
但是现在通过浏览器是不能访问的,还需要配置nginx
7、FastDFS的nginx模块安装
[root@localhost 00]# cd /home/kai
在安装nginx之前先安装nginx所需的依赖lib:yum -y install pcre pcre-devel
yum -y install zlib zlib-devel yum -y install openssl openssl-devel解压nginx,和fastdfs-nginx-module:
[root@localhost kai]# tar -zxvf nginx-1.12.0.tar.gz[root@localhost kai]# tar -zxvf fastdfs-nginx-module_v1.16.tar.gz
进入fastdfs-nginx-module的config配置文件修改
[root@localhost kai]# cd fastdfs-nginx-module/src[root@localhost src]# vim config

去掉图上的local
然后进入nginx安装目录,添加fastdfs-nginx-module: [root@localhost kai]# cd nginx-1.12.0[root@localhost nginx-1.12.0]# ./configure --prefix=/usr/local/nginx --add-module=/home/kai/fastdfs-nginx-module/src
如果没有错误信息,开始安装
[root@localhost nginx-1.12.0]# make [root@localhost nginx-1.12.0]#make install
修改nginx的conf文件
[root@localhost nginx-1.12.0]# cd /usr/local/nginx/conf [root@localhost conf]# vim nginx.conf
添加:
location /group1/M00 { root /usr/kai/dev/fastdfs/fastdfs_storage_data/data; ngx_fastdfs_module; } 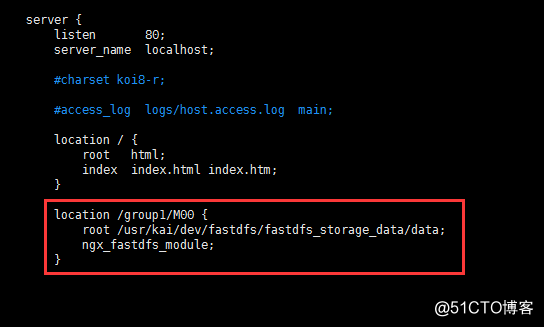
然后进入FastDFS安装时的解压过的目录,将http.conf和mime.types拷贝到/etc/fdfs目录下:
[root@localhost fastdfs-5.11]# cd /home/kai/fastdfs-5.11/conf/ [root@localhost conf]# ls anti-steal.jpg http.conf storage.conf tracker.conf client.conf mime.types storage_ids.conf [root@localhost conf]# cp http.conf /etc/fdfs/ [root@localhost conf]# cp mime.types /etc/fdfs/
另外还需要把fastdfs-nginx-module安装目录中src目录下的mod_fastdfs.conf也拷贝到/etc/fdfs目录下:
[root@localhost conf]# cp /usr/kai/dev/nginx/fastdfs-nginx-module/src/mod_fastdfs.conf /etc/fdfs/
对刚刚拷贝的mod_fastdfs.conf文件进行修改:
[root@localhost conf]# vim /etc/fdfs/mod_fastdfs.conf
修改:
base_path=/usr/kai/dev/fastdfs/fastdfs_storage #保存日志目录 tracker_server=192.168.18.91:22122 #tracker服务器的IP地址以及端口号 storage_server_port=23000 #storage服务器的端口号 url_have_group_name = true #文件 url 中是否有 group 名 store_path0=/usr/kai/dev/fastdfs/fastdfs_storage #存储路径 group_count = 3 #设置组的个数,事实上这次只使用了group1
在文件的最后,设置group
[group1] group_name=group1storage_server_port=23000store_path_count=1store_path0=/usr/kai/dev/fastdfs/fastdfs_storage_datastore_path1=/usr/kai/dev/fastdfs/fastdfs_storage_data[group2]group_name=group2storage_server_port=23000store_path_count=1store_path0=/usr/kai/dev/fastdfs/fastdfs_storage_data [group3] group_name=group3storage_server_port=23000store_path_count=1
store_path0=/usr/kai/dev/fastdfs/fastdfs_storage_data
创建M00至storage存储目录的符号连接:
[root@localhost conf]# ln -s /usr/muyou/dev/fastdfs/fastdfs_storage_data/data/ /usr/muyou/dev/fastdfs/fastdfs_storage_data/data/M00
启动nginx:
[root@localhost conf]# /usr/local/nginx/sbin/nginx
ngx_http_fastdfs_set pid=13397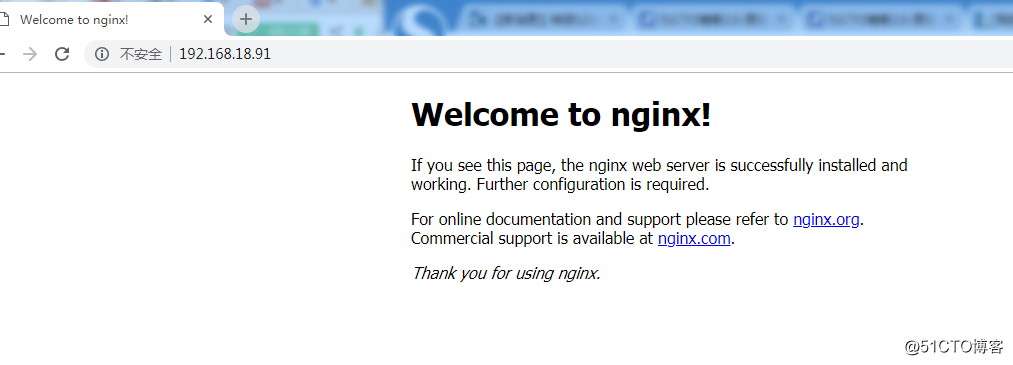
然后把刚才图片上传的地址加到IP地址后面,成功,完美!

转载于:https://blog.51cto.com/13242922/2384228